|
|
|
|
WebCalendar User Manual
Document Version: $Id: WebCalendar-UserManual.html,v 1.5 2004/02/25 17:35:58 cknudsen Exp $ Table of Contents
IntroductionWebCalendar is a multi-user calendar system. It is intended to be simple to setup and use while still providing advanced features and flexibility to serve the purposes of a widely varied user base. It can be used to as an events calendar for an organization or as a scheduling system for an intranet. WebCalendar is an open source application. What does this mean for you? You get to use the application free of charge. (See the licensing section for more information on licensing.) Additionally, you have access to the WebCalendar developer community. You can post questions to various forums and have knowledgeable developers respond. The primary site for WebCalendar development is at SourceForge.net: http://sourceforge.net/projects/webcalendar/ The first public release of WebCalendar was in December of 1999. Users and Events
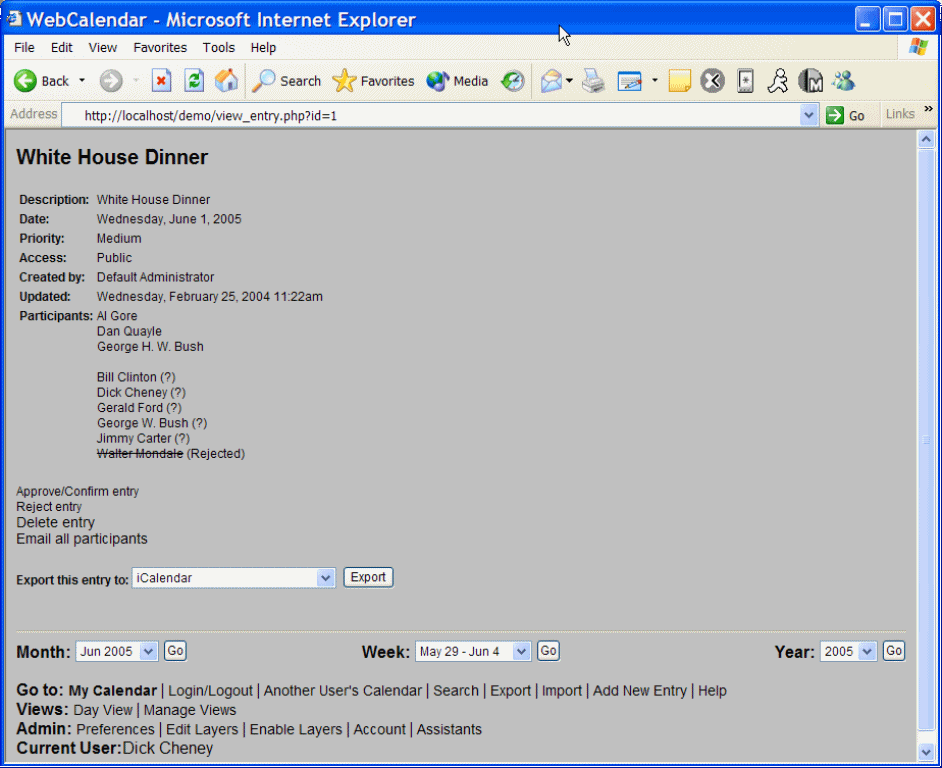
WebCalendar can be configured to operate in either single-user or multi-user mode. Note: If your installation of WebCalendar is a single-user configuration, a large portion of this document will not apply. All events entered into the system will be associated with one or more users. There is no limit to the number of users that can use WebCalendar (aside from system resources such as database space). Each user will have a status for the event: "Waiting for Approval," "Approved" or "Rejected." (If your system is configured to not require approvals, then all events will always be in the "Approved" status). If you add an event with yourself as a participant, your status will be "Approved" by default. If you include any other users, then their status will be "Waiting for Approval". If configured to do so, event participants will receive an email notification indicating that there is a new event waiting for approval. (The user who creates the event will not receive this email notification since their status will automatically be set to "Approved.") When viewing the full details of an event, the status of event participants will be designated as seen below: 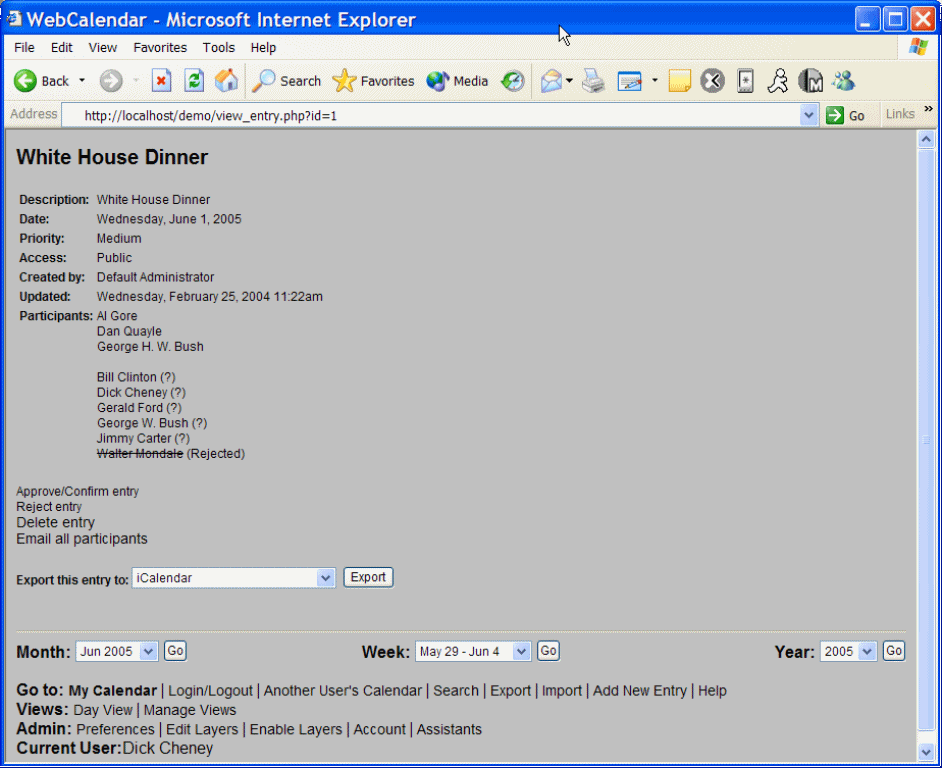
Notes:
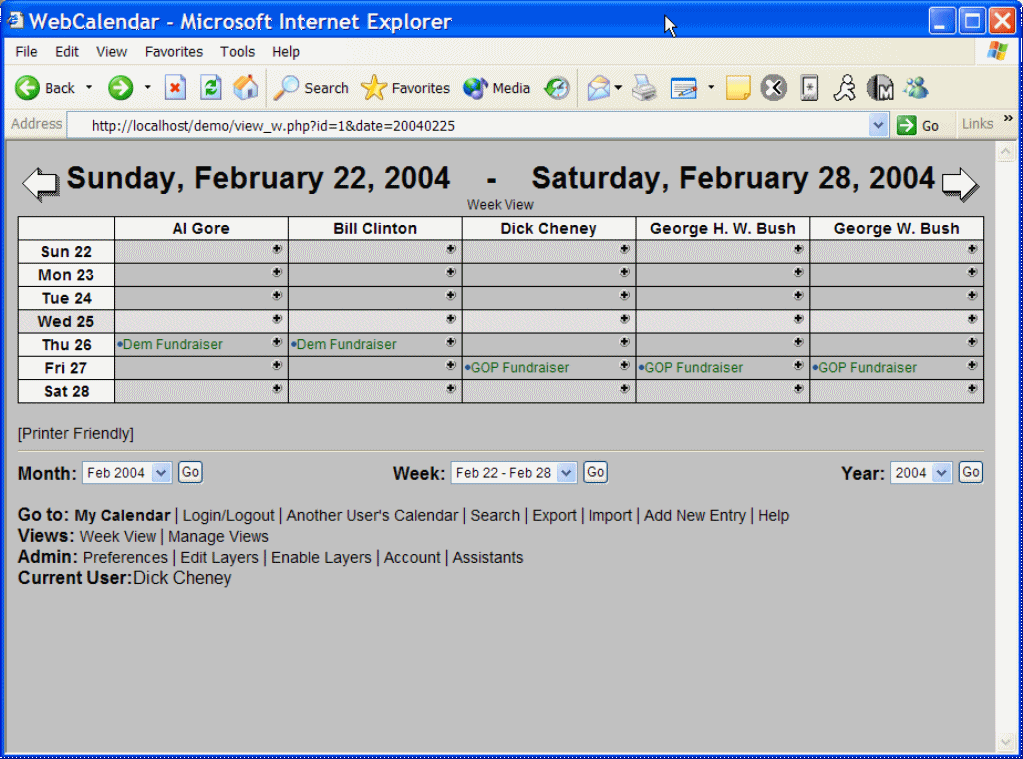
Repeating EventsRepeating events may be used to create recurring event entries on your calendar. You may select an end date so that the event stops recurring at the specified date. The "Frequency" field allows you to specify how often the event occurs. A "0" or "1" in the "Frequency" field will indicate the event occurs every time (every day for daily, every month for monthly, etc.) A "2" in the "Frequency" field will indicate the event should happen every other time (every other day for daily, every other month for monthly, etc.) DailyIf you select "Daily", the event will repeat at the same time every day until the end date (if specified). WeeklyIf you select "Weekly", the event will repeat every week on the days selected until the end date (if specified). You must select days in the "Repeat Days" section when using repeat "Weekly". Monthly (by day)If you select "Monthly (by day)", the event will repeat on the same weekday of the month every month until the end date (if specified). For example, if the initial date is the second Monday of the month, the event will repeat on every second Monday of each month. TIP: This feature can be used to handle complicated repeating events like Thanksgiving, which is the fourth Thursday in November. You would select the initial date to be the proper Thanksgiving date and then enter "12" for the "Frequency". This would tell WebCalendar that the event happens on the fourth Thursday of the month on every 12th month, starting in November. Monthly (by day (from end))If you select "Monthly (by day(from end))", the event will repeat on the same weekday of the month (counting back from the end of the month). For example, if the initial date is the last Friday of the month, the event will repeat on every last Friday of each month. Monthly (by date)If you select "Monthly (by date)", the event will repeat on the same date of the month every month until the end date (if specified). For example, if you the initial date is May 12th, then the event will repeat on June 12th and so on. YearlyIf you select "Yearly", the event will repeat on the same date every year until the end date (if specified). External UsersIf your system is not configued to allow External Users, you may skip this section. External Users* allows you to add participants to an event that are not WebCalendar users. When adding or editing an event, you will see a free text area titled "External Participants." In this area you can enter names of participants. If your system is configued to allow it, the External Participants will receive email notifications and email reminders if their email address was specified. The proper way to specify External Participants is one name per line with an option email address. All of the following would be legal entries: Joe SmithWhen an email address is encountered (within the '<' and '>'), that user will receive email notifications and reminders. NonUser CalendarsNonUser Calendars* allow you to maintain a calendar that is not associated with a user. Users can then either view the calendar of the NonUser Calendar (if the system settings allow it) or add the NonCalendar user as a layer to their own calendar. (See Layers documentation.) This can be used for resource management such as scheduling usage of a conference room. If used in combination with views, you could quickly view the availability of multiple conference rooms on the same page. CategoriesIf your system is not configured to use categories, you may skip this section. Events may be associated with a category, but it is not required. Categories can be user-level or global. Each user maintains his own list of user-level categories and the system administrator maintains the list of global categories. When creating or editing event, you may specify the category for the event. If you include participants other than yourself, the category that other users will see will be "None" (if you selected one of your user-level categories) or the same category you selected (if you selected a global category). When viewing the calendar (month, week or day), you will see a selection box near the top of the page that allows you to filter events based on a category. When you select a category from this menu, only events associated with that category will appear in your calendar. ViewsViews* allow you to see the calendar of more than one user (or NonCalendar User) at a time. You can create a new view by using the "Manage Views" link at the bottom of each page. There are a handful of different types of views summarized below. DayThe "Day" view shows each users' availablity for the selected day. 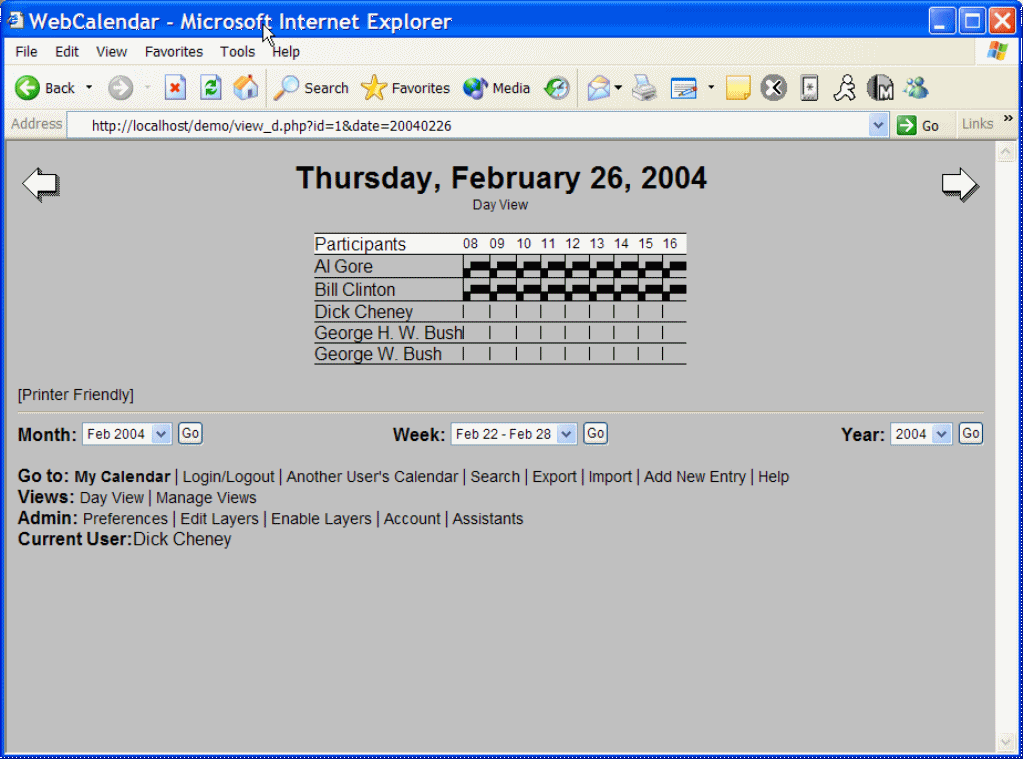
Week (Users horizontal)
Week (Users vertical)
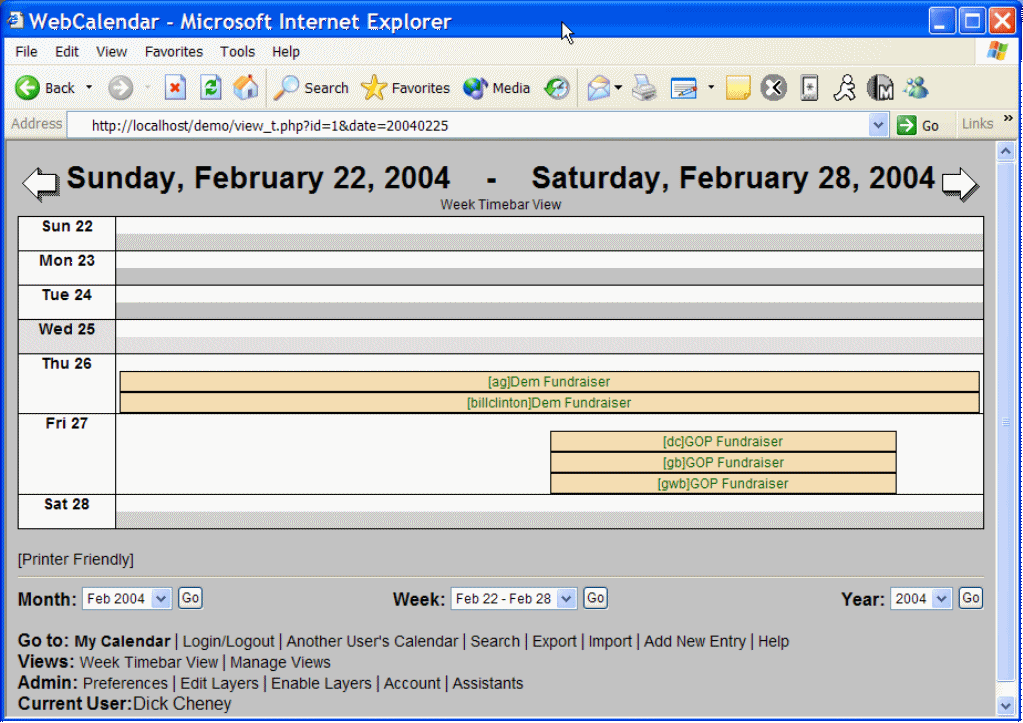
Week (Timebar)
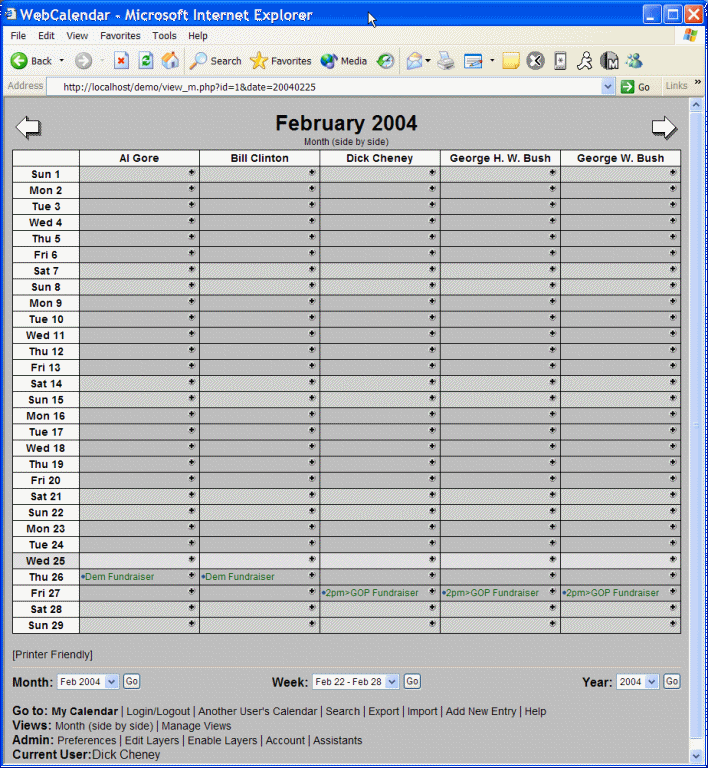
Month (Side By Side)
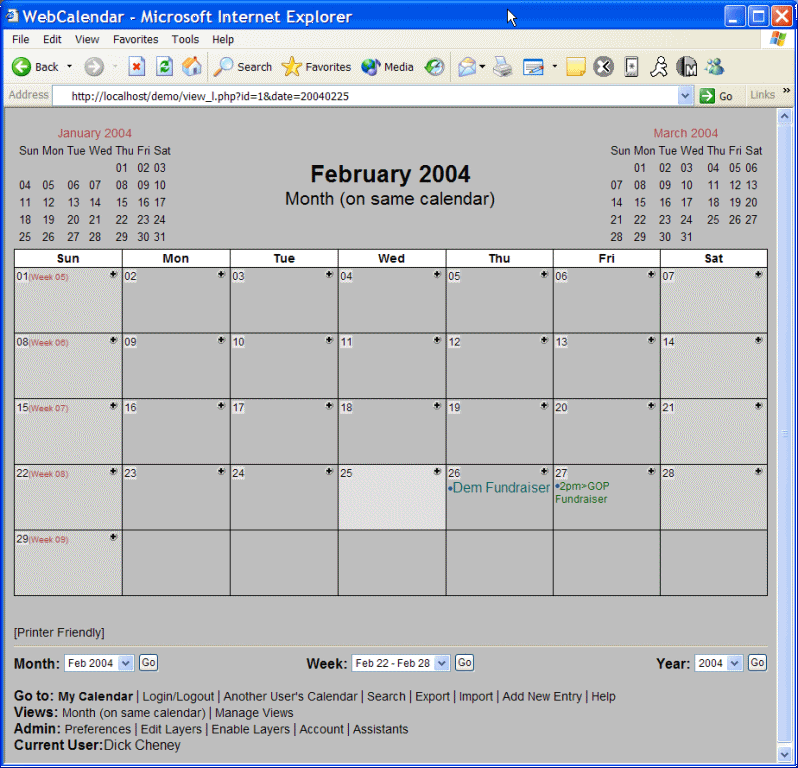
Month (On Same Calendar)
GroupsIf you system is not configured to use Groups*, you may skip this section. Groups allow systems with many users to divide users into smaller groups of users. Additionally, if configured to do so, users will only be able to access other users in the same group(s) either when viewing other users' calendars or when selecting participants for an event. When adding or editing events, a "Select..." button will be available. This button will popup a user selection window that will allow event participants to be selected by group. LayersLayers* allow you to overlay another user's calendar on top of your calendar. You can add a new layer to your calendar by selecting the "Edit Layers" link at the bottom of each page. When adding the layer, you can choose a color. When an event from the layer specified in the layer is displayed on your calendar, the text of the event will appear in this color. TIP: On slow servers, you may find that layers cause the month view to be considerably slower. Set your default view to be "Week" rather than "Month" in your Preferences. TIP: If you have more than one configuration of users that you would like to use with layers, you can create more than one "Daily" View to do this. Assisant/BossIf your system is not configured to allow Assistant Mode, then you may skip this section. Assistant Mode allows one user (the Assistant*) to help manage the calendar of another user (the Boss*). The Boss creates the relationship in the calendar by selecting the "Assistants" link at the bottom of each page. When the Boss has selected one or more assistants, each assitant will see a new "Manage Calendar of" link at the bottom of the page. This link will quickly bring the Assistant to a view of the Boss' calendar. When adding an event from this page, the default participant will be only the Boss. PreferencesVarious components of WebCalendar can be customized by modifying your user preferences.
|
|
Home •
Contact Us •
Services • Activities |